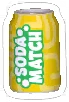
Plan your approach to Level 199
Configuration 1 · Targets, tray management, and time-saving decisions
Your collection plan
Level 199, Configuration 1 has a 1:15 time limit. Your targets are Can Blue × 9; Can Green × 9; Can Orange × 9; Can Red × 9; Can Yellow × 9. There are 132 objects on the board: 45 targets and 87 non-targets. Targets account for 34% of the starting objects.
Step-by-step clearing plan
1. Match your goal icons and 1:15 timer to Configuration 1 before using this plan. Track Can Blue (9 objects), Can Green (9 objects), Can Orange (9 objects), Can Red (9 objects), Can Yellow (9 objects). Compare the full preview for this configuration; object positions can differ.
2. Scan for three accessible objects of one exact target type. The largest workload is Can Blue (9 objects); revisit it after each clear, while taking complete triples of other targets when available. Identify all three partners before opening a new set.
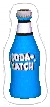
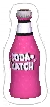
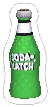
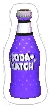
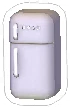
3. If a target is covered, look for a complete removable non-target triple. Common non-targets in this configuration include Fridge White, Soda Blue, Soda Pink. Clear a set only when it improves access or completes an existing tray pair. Rescan after the pile settles instead of assuming a fixed hidden position.
4. Check the tray after each triple. Finish pairs already started before adding unrelated types. If you cannot identify a third partner, stop opening new sets and compare shapes and color variants with the item icons above.
5. During the final part of the 1:15 limit, read the remaining target counters and narrow your search to those exact variants. Clear blockers only when needed to reach a remaining target; collecting every non-target is not the goal. This is a configuration-based decision plan, so adapt each choice to the visible board.
Which items to distinguish
Keep these target variants separate: Can Blue / Can Green / Can Orange / Can Red / Can Yellow. A shared shape does not make different variants a matching set. Find three of the same variant before starting that set.
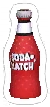
The item names also share color labels in these pairs: Can Blue and Soda Blue; Can Green and Soda Green; Can Red and Soda Red. Use the icon's outline as well as its color. These are recognition checks based on item names, rather than a claim that every pair looks equally similar on the board.
Where to focus your opening
You have 5 target types to track. Start with a complete exposed triple, then rescan the surface. Choose the type whose third match you can already identify, instead of opening unfinished sets across Can Blue, Can Green, Can Orange at the same time.
Non-targets make up 66% of this configuration (87 objects). When targets are obscured, look for finishable non-target triples that reveal them. Keep each removal purposeful: a single non-target occupies tray space without completing a set. The counts indicate a large distraction pool, but do not establish where any object is hidden.
How to use the time limit
The 45 target objects require 15 target triples. Dividing the 75-second limit by those triples gives 5.0 seconds per target triple if all time were spent on targets. This is a planning allowance, not a measured completion time; searching and clearing non-targets also use that same clock.
Use short scans rather than long searches for a preferred target. Complete visible sets, then narrow the next scan to types already waiting in your tray. As the clock runs down, use the remaining goal counters to decide which shapes still deserve attention.